How to Build a Raised Bed Garden from Scratch

A pile of cedar planks sits on a flat patch of grass, smelling of resin and fresh sawdust. Beside them, a heavy-duty cordless drill, a box of 3-inch exterior screws, and a stack of landscape fabric wait to be used. This is the starting point for a raised bed garden—a structured, elevated space that gives you total control over your soil quality, drainage, and plant selection. Building your own raised beds is one of the most effective ways to transition from a standard lawn to a productive, edible landscape, especially if you are dealing with poor native soil or heavy clay.
This guide walks you through the technical process of selecting materials, measuring your space, and assembling a durable garden bed that will last for years. Whether you want to grow heirloom tomatoes or a dense collection of leafy greens, a well-built raised bed provides the foundation for a thriving ecosystem.
Selecting Your Materials
The longevity of your garden depends heavily on the materials you choose. While it is tempting to grab the cheapest lumber available at a big-box store like Home Depot or Lowe's, certain woods will rot within two seasons, while others will serve you for a decade.
Wood Types and Longevity
If you are working with a budget, untreated pine is an option, but be aware that it decomposes quickly when in constant contact with moist soil. For a more permanent solution, look for Western Red Cedar or Redwood. These woods contain natural tannins that resist rot and insect damage without the need for chemical treatments. If you choose to use pressure-treated lumber, ensure it is modern ACQ (Alkaline Copper Quaternary) treated wood, which is considered safe for vegetable gardening, though many organic purists still prefer natural cedar.
Hardware and Fasteners
Standard interior screws will rust and snap within months due to the moisture in the soil and the expansion of the wood. You must use stainless steel or galvanized exterior screws. A 3-inch screw is the standard for most 2x6 or 2x12 construction, providing enough bite to hold the weight of several inches of wet soil.
Liners and Barriers
To protect the bottom of your bed and manage weeds, you will need a barrier. Geotextile landscape fabric is excellent for drainage, but if you are building directly over a grass lawn, you might consider a layer of thick, non-glossy cardboard (the "sheet mulching" method) to kill the existing turf before adding soil. This eventually breaks down into organic matter, feeding the soil biology.
Planning the Layout and Dimensions
Before you drive a single screw, you need to map out your garden bed. A common mistake is building a bed that is too wide to reach the center, which leads to soil compaction as you step into the bed to weed or harvest.
- Width: Aim for a maximum width of 4 feet. This allows you to reach the middle from either side without straining your back or stepping into the growing area.
- Length: Length is flexible, but 6 to 8 feet is a standard manageable size. If you are building a long row, consider adding a center brace to prevent the weight of the soil from bowing the wood outward.
- Height: A height of 12 to 18 inches is ideal for most vegetables. If you have significant mobility issues or want to grow deep-rooted crops like carrots or parsnips, consider a 24-inch height.
Consider the sun exposure of your yard. Most edible crops, such as peppers, tomatoes, and squash, require at least 6 to 8 hours of direct sunlight. Place your beds in a location that isn't shaded by your house or large trees during the peak growing hours of 10:00 AM to 4:00 PM.
Step-by-Step Construction Guide
Gather your tools: a circular saw (or have the lumber pre-cut at the store), a power drill, a level, a tape measure, and a hammer. Follow these steps to ensure a sturdy build.
Step 1: Prepare the Site
Clear the area of large rocks, debris, or heavy weeds. If you are placing the bed on a flat lawn, use a shovel to scalp the grass as low as possible. Use a string line and stakes to mark the perimeter of your bed to ensure your corners are square. If the ground is uneven, you may need to dig a shallow trench (about 1-2 inches deep) where the wooden frame will sit to ensure it is level.
Step 2: Cut and Assemble the Frame
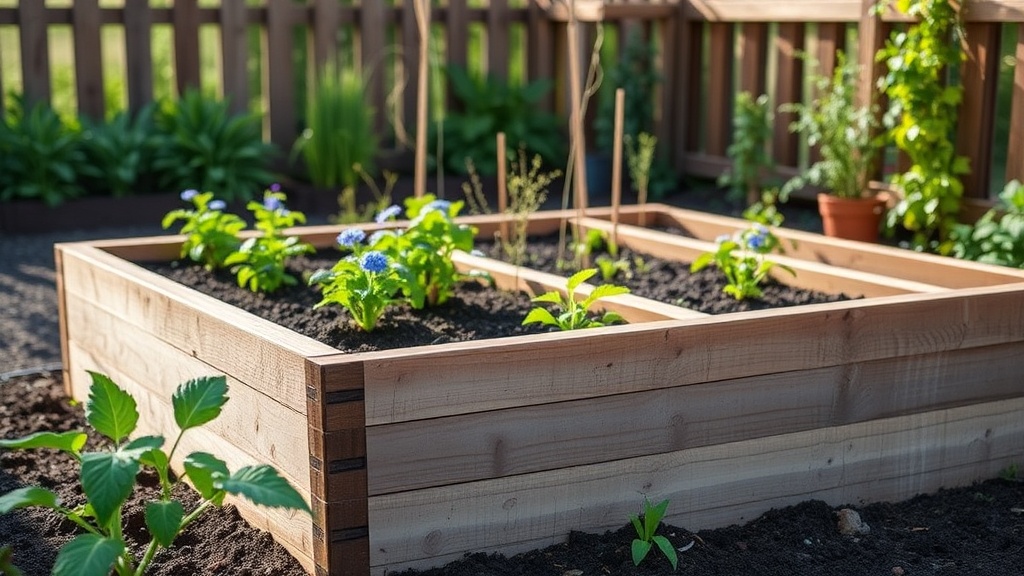
For a standard 4' x 8' bed using 2x6 boards, you will need four 8-foot boards and four 4-foot boards. To create a sturdy corner, use a corner post. A 4x4 pressure-treated or cedar post cut to the height of your bed (e.g., 12 inches) should be placed in each interior corner. This provides a solid surface to screw the side boards into, preventing the corners from splitting under the pressure of the soil.
- Lay your four 8-foot boards and four 4-foot boards on the ground to visualize the assembly.
- Stand the 4x4 corner posts upright.
- Drive the exterior screws through the 8-foot boards into the 4x4 posts.
- Attach the 4-foot end boards to the posts.
- Use a level on every side to ensure the frame is not leaning. A crooked bed will lead to uneven water distribution and drainage issues.
Step 3: Install the Lining
Once the wooden frame is assembled and leveled, line the interior sides with heavy-duty landscape fabric or a high-quality plastic liner (if you are worried about wood rot). If using fabric, staple it to the inside of the wooden walls using a staple gun. This keeps the soil from leaching out through the cracks while allowing water to permeate. If you are building over grass, lay down a thick layer of corrugated cardboard at the bottom of the frame to suppress weeds and grass growth.
Filling the Raised Bed
The most critical part of a raised bed is not the wood, but the "living" material inside it. Do not use standard "topsoil" from a bag, as it is often too dense and lacks the necessary aeration for a raised system. Instead, use a high-quality raised bed mix or create your own.
The Ideal Soil Composition
A successful raised bed mix should be a blend of three main components:
- Organic Matter (40%): This includes high-quality compost, aged manure, or leaf mold. This provides the nutrients and microbial life your plants need.
- Aeration (30%): Materials like perlite, vermiculite, or coarse sand help prevent the soil from becoming compacted and waterlogged.
- Base Material (30%): A mix of peat moss or coconut coir (coir is more sustainable) provides moisture retention and structure.
If you are building a very deep bed (over 18 inches), you can use a method called Hugelkultur to save money on soil. This involves filling the bottom 1/3 of the bed with rotting logs, branches, and organic debris. This material will slowly decompose over several years, providing long-term nutrients and improving drainage. This is a great way to integrate your garden into a larger backyard edible forest garden design.
Maintenance and Long-Term Care
Once your bed is filled and planted, your job shifts from builder to caretaker. Raised beds can dry out faster than traditional in-ground gardens due to their elevated position and increased drainage. Keep a close eye on moisture levels, especially during the heat of July and August.
Mulching for Moisture
Apply a 2-inch layer of organic mulch on top of your soil once your seedlings are established. Straw, shredded bark, or even pine needles work well. Mulch serves two purposes: it prevents water evaporation and suppresses any weeds that might attempt to colonize the surface. This is particularly important if you are growing high-maintenance crops like brassicas or heavy-feeding tomatoes.
Soil Refreshing
Every spring, you should top off your raised beds with 2-3 inches of fresh compost. This replenishes the nutrients that the previous season's crops consumed. Unlike in-ground gardening, where you have to till the soil, in a raised bed, you simply "top-dress" the surface. This keeps the soil structure intact and maintains the healthy microbial populations you've worked hard to build.
If you find your garden is becoming a lush, productive sanctuary, you might want to expand your footprint. Consider building a backyard pollinator buffet adjacent to your raised beds to ensure your vegetables are being pollinated by a healthy population of bees and butterflies.
Building a raised bed is a physical, rewarding process. It moves you away from the sterile, controlled look of a traditional lawn and toward a dynamic, living system that produces food. It requires a bit of heavy lifting and a solid understanding of materials, but the result is a permanent, productive piece of your home's landscape.
Steps
- 1
Select Your Location and Materials
- 2
Cut the Lumber to Size
- 3
Assemble the Frame
- 4
Prepare the Ground and Add Soil