Revive Your Old Garden Tools With a Simple Vinegar Soak

In this guide, you'll learn how to remove rust, clean grime, and restore the edge of your metal garden tools using a simple white vinegar soak. Rust isn't just an eyesore; it's a sign of oxidation that can eventually pit and weaken your favorite trowels, shears, and spades. By using a mild acid like vinegar, you can strip away oxidation without the need for harsh, industrial chemicals or expensive professional sharpening services.
I've spent enough time digging in the dirt to know that a dull, rusty shovel is a heavy, frustrating-to-use mess. You don't need to buy a whole new set of Fiskars pruners every time a little rust shows up. A bit of patience and a bottle of white vinegar can make your old tools feel brand new again.
Why Does Rust Form on Garden Tools?
Rust forms when iron or steel reacts with oxygen and moisture, a process known as oxidation. Most garden tools are made of high-carbon steel or iron-based alloys, which are particularly prone to this when left damp or uncleaned after a day in the garden. If you leave your tools in a shed that gets humid, or if you don't wipe them down after working in wet soil, that rust will start to creep in almost immediately.
It's not just about the metal, though. Rust can transfer to your skin or even your plants if the tool is truly neglected. While a little surface rust is fine, deep pitting can ruin the structural integrity of a tool. I've seen many a good spade get tossed in the trash simply because someone didn't realize a little vinegar could save it.
A few things contribute to faster rusting:
- Leaving tools in direct contact with wet soil.
- Storing tools in high-humidity environments like an uninsulated shed.
- Not cleaning off organic matter (like sap or mud) before storage.
- Using salt-based fertilizers near metal tool handles or blades.
How Do I Remove Rust from Garden Tools Using Vinegar?
To remove rust using vinegar, you must soak the metal parts of your tools in a container of white distilled vinegar for a period ranging from a few hours to several days, depending on the severity of the rust. The acetic acid in the vinegar reacts with the iron oxide, breaking it down so it can be scrubbed away.
Here is the step-by-step process I use in my own backyard whenever my old hand trowels look a bit too "vintage" for my liking:
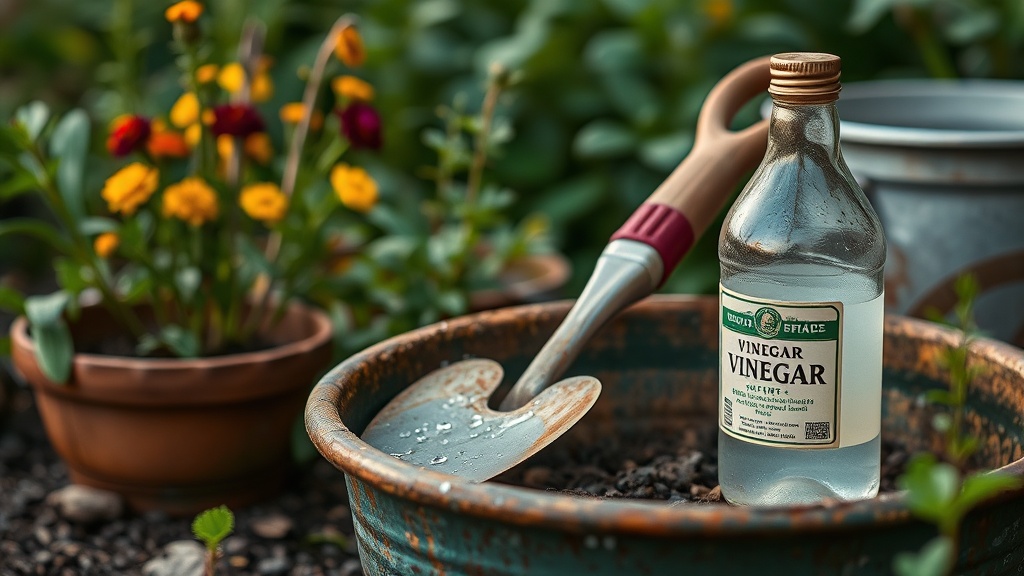
- Gather your supplies: You'll need white distilled vinegar (the cheap stuff works best), a plastic bucket or a large glass jar, an old toothbrush or a stiff-bristled brush, and some clean rags.
- Prepare the soak: Pour enough vinegar into your container to fully submerge the metal parts of the tool. If you're doing a large shovel, a plastic tub works great.
- The Soaking Phase: Submerge the tool. For light rust, 2 to 4 hours is usually enough. For heavy, crusty oxidation, you might need to leave it overnight. (Don't leave it for more than 24-48 hours, or the acid might start to dull the metal too much).
- Scrubbing: Once the tool comes out, the rust should look soft or even mushy. Use your brush or a piece of steel wool to scrub the remaining residue away.
- Neutralize and Dry: This is the step most people skip, but it's the most important. Rinse the tool thoroughly with water to stop the acid reaction. Dry it immediately and completely with a clean rag.
- Oil the metal: To prevent the rust from returning, apply a thin layer of a food-safe oil or a dedicated tool oil to the metal surface.
If you're working on a larger item, like a hoe or a spade, you might not be able to dunk the whole thing in a bucket. In that case, you can soak a rag in vinegar, wrap it around the rusted area, and let it sit for a while before scrubbing.
What is the Best Type of Vinegar for Cleaning Metal?
White distilled vinegar is the best option because it is highly acidic and cost-effective, making it much more efficient than apple cider or balsamic varieties. You want the highest acidity possible to ensure the oxidation breaks down effectively. Most standard white vinegars found in a grocery store are around 5% acetic acid, which is the sweet spot for this job—it's strong enough to work but won't instantly destroy the metal.
I usually stick to the generic brands. It's a practical way to save a few dollars while getting the job done. You don't need anything fancy. If you're looking for a more specialized cleaner for extremely heavy-duty rust, you might look into products from Wikipedia's entry on metal cleaning or professional-grade chemical de-rusters, but for a backyard gardener, white vinegar is plenty.
| Method | Best For... | Pros | Cons |
|---|---|---|---|
| White Vinegar Soak | Hand tools, trowels, shears | Cheap, non-toxic, easy | Takes time (hours/days) |
| Steel Wool/Sandpaper | Surface rust, stubborn spots | Immediate results | Physical labor, can scratch |
| Commercial Rust Remover | Heavy industrial tools | Very fast, powerful | Can be toxic, expensive |
How Often Should I Maintain My Garden Tools?
You should maintain your tools after every significant use, especially if you've been working in damp or heavy soil. A quick wipe-down is the bare minimum. If you're a heavy gardener, a deeper cleaning once a season (at the end of summer or before winter storage) is a great habit to build. It keeps your gear in top shape and ensures your tools are ready to go when the first spring thaw arrives.
I try to make it a ritual. After the heavy lifting of the growing season is done, I take an afternoon to go through my tool shed. I check for rust, sharpen my blades, and oil the metal. It's a meditative process, really. It connects me back to the tools that helped me grow my food all year.
If you've been neglecting your tools and they've started to look a bit rough, don't panic. Even if they look quite bad, a deep soak can often bring them back. It's much better than spending money on new equipment. Speaking of maintenance, if you're also worried about the health of your plants, you might want to look into testing your forgotten seed packets to see if your harvest is worth the effort.
One thing to watch out for: if you use a lot of organic matter in your garden, like when you're choosing the right compost bin, the moisture levels in your shed can change. Keep your tools in a dry, elevated spot to prevent the cycle of rust from starting again. A simple wooden rack or even a sturdy shelf can keep them away from the damp ground.
Don't forget the handles! While the vinegar soak is for the metal, the wooden handles often get dry and splintery. A little bit of linseed oil on the wood handles makes them much more comfortable to hold and prevents them from cracking over time. It's those little details—the ones that make the work feel less like a chore and more like a craft—that make a real difference in the long run.
If you find that your tools are still struggling after a soak, you might need to look at the edge. A dull tool often has more than just rust; it has a blunt edge. A whetstone or a simple file can finish what the vinegar started. A sharp tool is a safe tool—it requires less force, meaning you're less likely to slip and hurt yourself while working.
It's a simple cycle: use, clean, oil, store. If you stick to it, your tools will last a lifetime. And in a world that's constantly telling us to buy more and replace everything, there's something deeply satisfying about keeping a well-loved, well-maintained set of tools by your side.
Steps
- 1
Prepare the Vinegar Bath
- 2
Submerge the Metal Parts
- 3
Scrub Away the Residue
- 4
Dry and Oil Immediately