The Windowsill Revolution: Why Starting Seeds Indoors Will Change Your Garden (And Your Soul)

Hey friends, okay—let's look at the kitchen table right now. It's covered in something beautiful: dirt.
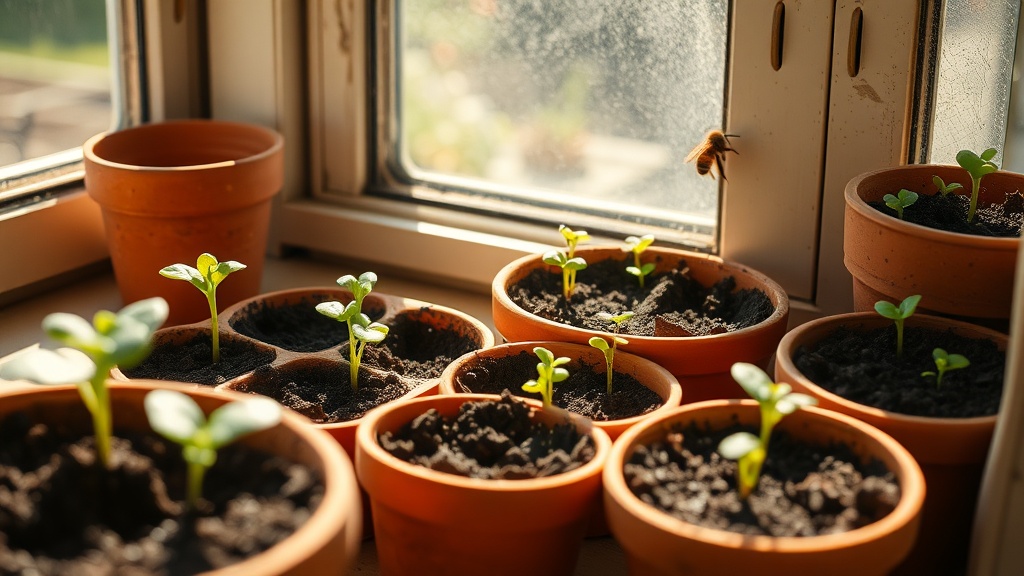
I'm writing this at 7am on a Sunday, coffee in hand, staring at 24 little cells of potting mix perched on my south-facing windowsill. Outside, Asheville is still holding onto winter's coat—there's frost on the grass and the morning air has that sharp, clean bite. But inside? Inside, I just planted my first tomatoes. And friends, that feeling—that feeling—is why I do this.
For years, I bought my seedlings from the garden center like everyone else. Nothing wrong with that! (Honestly, some of my best tomatoes came from a folding table outside a hardware store in May.) But something shifted when I started my own. Maybe it was watching a seed I'd cradled in my palm split open and reach for the light. Maybe it was the sheer, defiant hope of it—life finding a way on my kitchen windowsill while winter still raged outside.
Why Start Your Own Seeds? (Besides the Obvious Joy)
Here's the thing the garden centers don't advertise: when you buy seedlings, you're buying what's profitable for them to grow. That usually means "Roma" tomatoes, "Straight Eight" cucumbers, and maybe a token heirloom if you're lucky. But when you start from seed? The world opens up.
Last year I grew Cherokee Purple tomatoes the size of my fist, streaked with green and tasting like actual summer. I grew Dragon's Tongue beans—purple pods with cream-colored stripes that looked like edible stained glass. I grew Lemon Queen sunflowers that hummed with so many bees my neighbor asked if I'd installed a hive.
(I hadn't. The bees just knew where the good stuff was.)
Starting seeds indoors isn't just about variety, though. It's about timing. Here in Zone 7, our last frost date dances around mid-April, but tomatoes need 6-8 weeks of head start. Do the math: if you want tomatoes by July, you need to start now. Right now. As in, this week.
The Setup (It's Simpler Than You Think)
I know what you're picturing: grow lights, heat mats, humidity domes, a complicated irrigation system. Put that vision down. You don't need it. Here's what I actually use:
- A sunny windowsill. South-facing is best, but east works too. You need at least 6 hours of direct light.
- Seed starting mix. Not potting soil—seed starting mix. It's lighter, fluffier, and holds moisture without drowning tiny roots. I like the stuff that comes in a compressed brick; it feels like a science experiment when you add water.
- Containers with drainage. You can buy fancy seed trays (I have some), but you know what works just as well? Those clear clamshell containers from the grocery store. The ones that held your organic spring mix. Wash them, poke holes in the bottom, boom—instant mini greenhouse.
- Seeds. Obviously. I get mine from Seed Savers Exchange and Baker Creek. Support the people keeping heirloom varieties alive.
- A spray bottle. For gentle watering. A torrent from the tap will wash your seeds right out of their cells.
The Ritual (This Is the Part I Love)
There's something meditative about filling those little cells. I run my fingers through the mix to break up any chunks. I press it in firmly but not too firm—you want it solid enough to hold a root, loose enough for that root to breathe. Then I make a little divot with my pinky finger, drop in a seed (or two, if I'm feeling cautious), and cover it with a whisper of mix.
The watering comes next, and here's my secret: I use warm water. Not hot, just warm. Like a bath you'd actually want to get into. Cold water shocks the seeds, slows germination. Warm water says "welcome home."
Then I cover the whole thing. If I'm using those clamshell containers, the lid becomes a humidity dome. If I'm using open trays, I slip them into a clear plastic bag. This keeps the moisture in, creates a little greenhouse effect, and means I don't have to water again until the seeds sprout.
(That's usually 5-10 days, depending on what you planted. Tomatoes are the eager ones—they'll pop in 6 days if your house is warm. Peppers take their time, like the divas they are.)
The Waiting (The Hardest Part)
Here's where most people fail. They plant the seeds, they water them, they check them obsessively for three days, and when nothing happens, they decide they did it wrong and they start over. Don't do this.
Seeds are not Amazon packages. They don't arrive on schedule. They germinate when they're ready—when the soil temperature is right, when the moisture has penetrated their coat, when some internal clock says "now." Your job is to be patient and to keep the mix damp (not soggy, damp—think wrung-out sponge).
Every morning, I lift the humidity dome and mist the surface if it looks dry. Every evening, I check again. It's become part of my routine, like checking on a sleeping child. And then, one morning—usually a Tuesday, for some reason—there they are. Two tiny leaves, impossibly green, reaching up toward the light.
I always whisper "hello" when I see them. (Don't judge me. You will too.)
When to Start What (A Quick Cheat Sheet)
Since it's late February, here's what I'm starting indoors right now:
- Tomatoes: Start now for May transplanting
- Peppers: Start now—they need even more time than tomatoes
- Eggplants: Start now, same as peppers
- Onions: Actually, these could have been started in January, but if you find short-day varieties, you can still squeeze them in
- Herbs: Parsley, cilantro, and chives can all handle an early start
Hold off on the cucumbers, squash, and beans for now—they grow fast and hate being root-bound. Start those 3-4 weeks before your last frost date. And direct-sow your carrots, beets, and radishes right into the ground; they don't transplant well.
The Transplant (When They Leave the Nest)
In 6-8 weeks, your seedlings will have true leaves (the second set, not the first baby cotyledons) and sturdy little stems. This is when you start "hardening off"—gradually introducing them to the outside world. I put mine on a shaded porch for an hour the first day, two hours the second, working up to full sun over a week.
It's nerve-wracking, watching them wilt in the sun even for a few minutes. But they toughen up. They have to. The garden isn't a nursery; it's the real world, with wind and rain and sudden temperature drops. Your job is to prepare them, not protect them forever.
When the soil is warm and the nights stay above 50°F, I plant them out. I bury tomatoes deep—up to their first set of true leaves—because they'll root along the stem and grow stronger. I mulch immediately with arborist wood chips (my "brown gold") to keep the soil moist and the weeds down. And then I stand back and watch them take off.
The Big Win: Start Something Today
Here's my challenge to you: start something this week. It doesn't have to be complicated. Buy a packet of tomato seeds and a bag of seed starting mix. Find a sunny window. Plant five seeds. Just five.
Water them. Wait for them. Watch them grow. By the time you're harvesting your first sun-warmed tomato in July, you'll understand what I mean when I say this changes your soul. You're not just growing food; you're growing hope. You're participating in a ritual older than agriculture itself—the miracle of a tiny, dormant thing waking up and reaching for the light.
And when you're standing in your garden this summer, eating a tomato that you started from a speck of a seed on a cold February morning, you'll feel it—that connection to the earth, to the seasons, to something bigger than yourself.
That's the windowsill revolution, friends. It starts small. But it grows bold.
Now go get your hands dirty. Eleanor Roosevelt and I are rooting for you.
What's your seed starting setup like? Do you use grow lights, or are you team windowsill like me? Drop a comment below—I love hearing about your garden origin stories.