Choosing the Perfect Lighting for Your Evening Garden

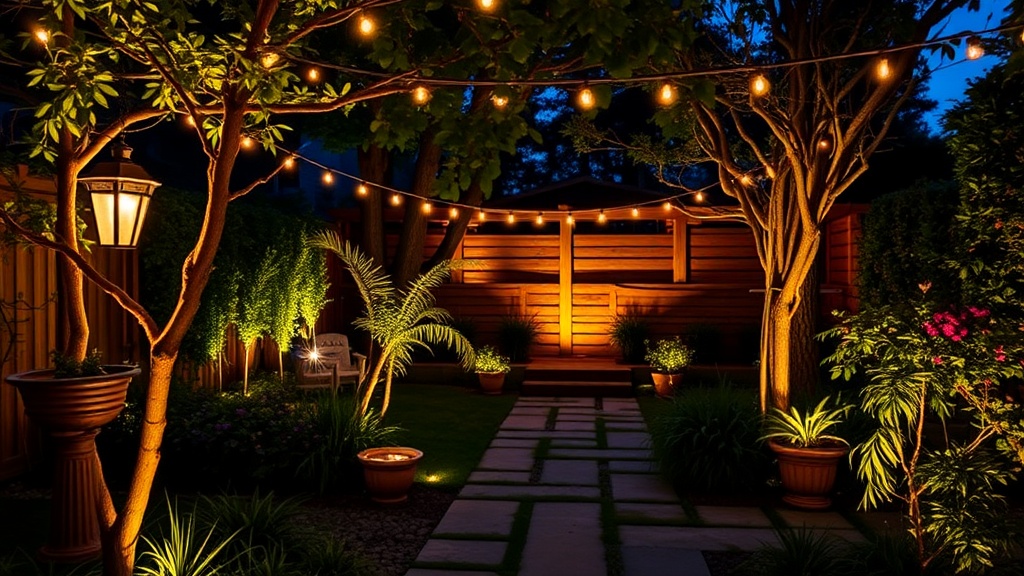
The sun dips below the fence line, leaving behind a bruised purple sky and the long, cooling shadows of the hydrangea bushes. A single amber glow catches the edge of a stone path, and suddenly, the garden feels different—it's no longer just a collection of plants, but a room with no ceiling. Getting your lighting right is about more than just seeing where you step; it's about setting a mood, ensuring safety, and highlighting the textures of your hard work. We're looking at how to layer different types of light to create a space that feels alive even after dark.
How Do I Choose the Right Type of Garden Lighting?
You should choose lighting based on the specific function of the area, mixing task lighting for paths with accent lighting for focal points. Most people make the mistake of buying a dozen identical solar stakes and sticking them in a row. That's a mistake. A good garden needs layers. You want low-level light for walking, medium-level light for dining, and high-level light to draw the eye upward toward a beautiful tree or a textured wall.
Think about your zones. If you have a seating area near the patio, you need something functional. If you have a specimen plant—maybe a Japanese Maple that took years to grow—you want something that highlights its shape without making it look like a stage production. I usually suggest starting with low-voltage LED systems. They're reliable and won't burn a hole in your electricity bill.
LEDs are the way to go because they consume very little energy and stay cool to the touch. If you're looking for high-quality components, check out the Philips Hue outdoor range for smart control, or stick to more traditional, heavy-duty brass fixtures from brands like Moonlight Lighting if you want something that lasts a decade. (Pro tip: always check the IP rating on any fixture—you want at least IP65 for rain and dust resistance).
Common Lighting Styles
- Path Lights: These sit low to the ground and cast light downward. They're perfect for marking a walkway without blinding you.
- Up-lights: Place these at the base of a tree or a large shrub to create drama and shadow.
- String Lights: Great for a whimsical, "suburban jungle" vibe over a dining table or pergola.
- Wall Sconces: These add a sense of architecture to your garden walls or the side of your house.
What Is the Best Way to Light a Path Safely?
The best way to light a path is to use low-voltage, downward-facing lights that illuminate the walking surface without creating glare in your eyes. You don't want a bright light shining directly into your face as you walk toward the house. Instead, you want the light to graze the ground. It should be enough to see a stray root or a stone, but not so bright that it washes out the natural colors of your plants.
I've seen way too many people install lights that are too bright. It ruins the vibe. If you're using a path light, try to place it slightly off the center of the path rather than directly in the middle. This creates a softer, more natural glow. It also helps prevent that "runway" look that feels a bit too clinical for a home garden. If your paths are narrow, make sure you aren't accidentally illuminating the neighbors' windows either—that's a quick way to start a fence dispute.
When you're setting these up, remember that the ground isn't always level. If you're working with uneven stone or mulch, you might need to adjust the angle of your light frequently during the first few weeks. It's a bit of a trial-and-error process, but once you find the sweet spot, it's worth it.
How Much Does Outdoor Lighting Cost?
The total cost depends on whether you choose a DIY solar-powered setup or a professional low-voltage wired system. A simple solar setup might only cost you a hundred dollars for a few dozen lights, while a professionally installed hardwired system can run into the thousands. You're paying for durability, control, and reliability when you go the wired route.
| Lighting Type | Initial Cost | Longevity | Best For |
|---|---|---|---|
| Solar Path Lights | Low | 1-3 Years | Temporary setups or budget gardens |
| Low-Voltage LED | Medium | 5-10 Years | Paths, flower beds, and general accenting |
| Hardwired Professional | High | 10+ Years | Large estates and permanent architectural lighting |
If you're on a budget, don't sleep on high-quality solar options. They've come a long way from the cheap plastic ones that die after one season. Look for stainless steel or heavy-duty polymer housings. However, if you want to be able to dim the lights via an app or a timer, you'll likely need a transformer and a wired system. It's a bigger investment up front, but the control you get over the ambiance is unmatched.
It's also worth noting that if you're working with a lot of plants, you'll want to be careful with heat. Even though LEDs are cool, they still generate a tiny bit of warmth. Don't bury a light directly against a delicate stem. Give your plants some breathing room.
How Do I Avoid Light Pollution in My Garden?
To avoid light pollution, use shielded fixtures that direct light downward toward the ground and avoid using lights that are too bright or too high in color temperature. You want to keep the light focused on your garden, not casting a massive glow into the night sky or your neighbor's bedroom. This is a big deal for local wildlife, too—excessive light can mess with the sleep cycles of insects and birds.
I'm a big advocate for "warm" light. If you see a light listed as "Daylight" or "Cool White," skip it. It looks clinical and harsh. Aim for "Warm White" (around 2700K to 3000K). This mimics the color of a sunset or a candle, which feels much more inviting. It also makes the green of your leaves look lush rather than washed out and grey.
One trick I use is to use "moonlighting." This involves placing a light high up in a tree canopy, pointing it down through the branches. It creates a soft, dappled effect on the ground that looks incredibly natural. It's much more subtle than a spotlight hitting a tree trunk head-on. It feels like the moon is peeking through the leaves, which is a much more organic way to light a space. To keep your garden looking sharp, you might also want to clean your outdoor furniture to ensure the light reflects off clean surfaces rather than dirt and grime.
If you have a lot of greenery, be mindful of how much light you're throwing at it. Too much light can actually interfere with a plant's photoperiodism—the way they sense light and dark to know when to bloom or drop leaves. It's a delicate balance between seeing your garden and letting it live its life. A little goes a long way.
When you're planning your layout, don't forget the vertical space. A garden isn't just a flat plane; it's a 3D environment. Use lights to highlight the height of your fence, the texture of a stone wall, or the underside of a pergola. This adds depth and makes even a small backyard feel much larger than it actually is. It's all about creating layers of light and shadow. The shadows are just as important as the light itself—they provide the mystery and the depth that makes a garden feel truly wild.