7 Simple Ways to Keep Your Garden Tools Working Like New for Years

You reach for your favorite pruners and the blades stick together. Your trowel bends under the pressure of clay soil. That shiny new hand fork you bought last spring? Rust spots are already blooming across the metal. Garden tools aren't cheap—and neither is the frustration of having them fail mid-season when you're elbow-deep in planting mode. The good news: a few straightforward maintenance habits can keep your shovels sharp, your pruners precise, and your wallet happier for years to come.
Why Do My Pruners Get Sticky and Hard to Open?
Sap, resin, and plant debris are the culprits behind gummy pruner blades. Every cut you make—especially through woody stems or resinous plants like pines and conifers—leaves behind microscopic residue. Over time, this builds into a sticky film that gums up the mechanism and attracts dirt like a magnet.
The fix is simpler than you'd think. After each gardening session, wipe your pruner blades with a cloth dampened in rubbing alcohol or a mild solvent like mineral spirits. This dissolves sap before it hardens. For stubborn buildup, a small brass brush (the kind sold for gun cleaning works perfectly) scrubs away caked-on debris without scratching the metal.
Don't forget the pivot screw—that's where most sticking originates. A single drop of lightweight machine oil (3-in-1 oil works beautifully) keeps the action smooth. Open and close the pruners several times to work the oil into the mechanism, then wipe away any excess. Your pruners will glide open with that satisfying snap instead of the reluctant creak you've been tolerating.
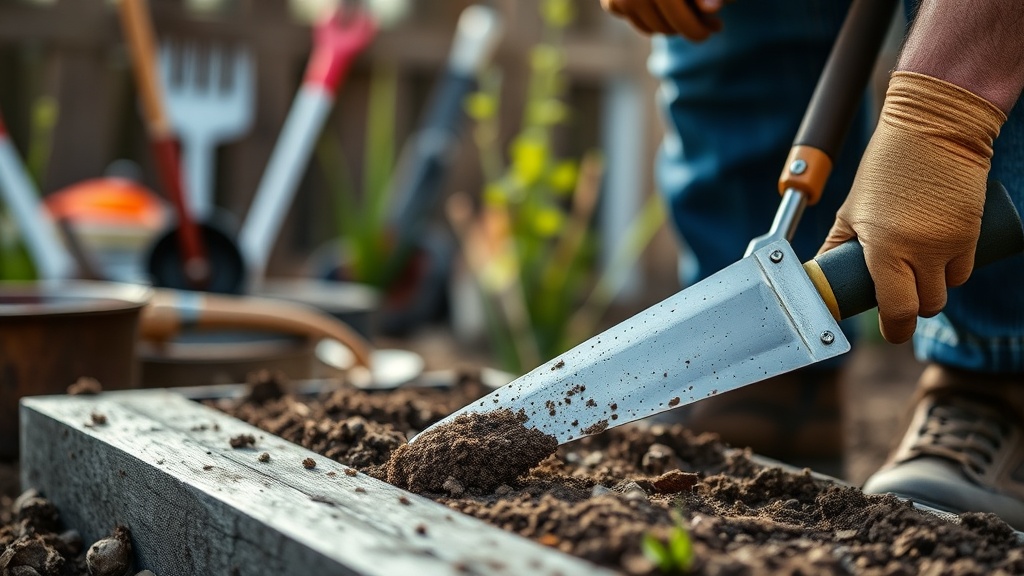
What's the Best Way to Sharpen Shovels, Hoes, and Digging Tools?
Dull digging edges make garden work exponentially harder. A sharp shovel bites into soil cleanly; a dull one bounces off compacted ground and sends vibrations up your arms. Most gardeners never think to sharpen their digging tools—yet this single habit transforms backbreaking labor into manageable work.
For shovels and spades, you're aiming for a clean bevel on the leading edge—not razor-sharp (that creates a safety hazard), but crisp enough to slice through roots and break up soil clods. A mill file works perfectly for this task. Clamp the tool securely, then run the file along the beveled edge at the original angle—usually about 45 degrees. Five to ten strokes per side typically restores a worn edge.
Hoes need attention too, especially if you use them for weeding in compacted soil. A sharp hoe skims just beneath the surface, severing weed stems with minimal effort. Dull hoes require you to hack repeatedly at the same spot, disturbing more soil than necessary and frustrating your precision.
For smaller tools like trowels and hand forks, a diamond sharpening stone makes quick work of restoring edges. The coarse side removes nicks and reshape bevels; the fine side hones to a working sharpness. Five minutes with a sharpening stone at season's start prevents hours of struggle later.
How Can I Prevent Rust on My Garden Tools?
Rust is the silent killer of garden tools. That orange creeping across your spade isn't just ugly—it's literally eating away the metal, pitting surfaces and weakening structural integrity. Once rust takes hold, it's far harder to eliminate than to prevent.
The simplest rust prevention? Dry storage. Tools left outside or in damp sheds develop rust regardless of their quality. Before putting tools away—even for a single night—wipe them clean and dry with an old towel. This thirty-second habit prevents moisture from starting the oxidation process.
For long-term protection, the traditional gardener's trick still works: a light coating of oil. After cleaning and drying tools at season's end, apply a thin film of linseed oil to wooden handles (it prevents cracking) and a light spray of WD-40 or similar protectant to metal surfaces. Some gardeners keep a bucket of sand mixed with used motor oil in their shed and plunge tools into it for storage—the sand cleans debris while the oil coating prevents rust.
For tools that already show rust spots, don't despair. Fine steel wool or a wire brush removes surface rust effectively. For more severe cases, soak the tool in white vinegar overnight (the acetic acid dissolves rust), then scrub clean and oil immediately to prevent re-oxidation.
Should I Replace Worn Handles or Buy New Tools?
A quality tool head deserves a second life. When a wooden handle cracks or splinters, many gardeners toss the whole tool into the trash—then spend three times as much replacing it with something inferior. Learning to replace handles saves money and keeps quality steel out of landfills.
Replacement handles cost a fraction of new tools. Hardware stores and garden centers stock standard sizes for shovels, rakes, and hoes. The process requires minimal tools: a drill to remove the old rivet, a new wooden handle, and possibly a file to adjust the fit. Most handle replacements take under twenty minutes.
Here's what most people miss—treat your new wooden handle before use. Linseed oil (again, your friend) rubbed into the wood prevents the drying and cracking that killed the previous handle. Apply two or three coats before assembly, letting each coat dry thoroughly. Your new handle will outlast the original.
Fiberglass handles offer an alternative worth considering for heavy-use tools. They're more expensive upfront but virtually indestructible and immune to rot. For tools you use constantly—your primary shovel, your go-to rake—fiberglass handles eliminate the maintenance cycle entirely.
What's the Right Way to Store Tools for the Off-Season?
Proper off-season storage isn't just about rust prevention—it's about tool longevity and your sanity next spring. Tools tossed haphazardly into corners get bent, blades get dinged against each other, and you'll spend the first warm day searching for that hand cultivator you know you own somewhere.
Vertical storage reigns supreme for hand tools. A simple pegboard or tool rack mounted at eye level keeps everything visible and accessible. Hang pruners with blades closed and locked. Suspend trowels and forks by their handles, not their working ends—this prevents edge damage and keeps them sharper longer.
For long-handled tools, wall-mounted brackets or simple nails work well. Store shovels and rakes with heads up and handles down—this prevents moisture from seeping into wooden handles through the end grain. If space allows, give each tool its own slot to prevent metal-on-metal contact that dulls edges.
Before that final storage session each autumn, give every tool a thorough cleaning. Remove caked soil with a wire brush. Sharpen cutting edges. Oil metal surfaces and wooden handles. Disinfect pruners with a bleach solution or alcohol to kill any lingering plant pathogens that could spread disease next season. This end-of-season ritual—perhaps an hour's work—rewards you with tools ready for immediate action when spring returns.
How Often Should I Deep-Clean My Garden Tools?
Surface cleaning after each use prevents immediate problems, but tools benefit from periodic deep cleaning too. Think of it like dental hygiene—daily brushing handles routine maintenance, but you still need professional cleanings to address what daily care misses.
For frequently used tools like pruners and trowels, aim for a monthly deep clean during active gardening season. Disassemble pruners completely if possible—remove the pivot screw, separate the blades, and clean all surfaces with solvent-soaked rags. Pay special attention to the area around the pivot where debris accumulates. Reassemble with fresh oil on the pivot and spring mechanism.
For digging tools, the deep clean involves more elbow grease. Use a wire brush to remove mineral deposits and soil stains that regular wiping misses. Wooden handles benefit from a light sanding followed by linseed oil treatment. Check for loose connections between heads and handles—tighten screws, reset wedges, or replace worn hardware before failures happen mid-project.
Can Quality Tools Really Last a Lifetime?
Absolutely—if you treat them right. My grandfather's border fork still opens soil in my garden sixty years after he bought it. The ash handle has been replaced twice. The head has been sharpened probably a hundred times. But the forged steel remains solid, the socket still tight, and the balance perfect. That tool has outlived three cheap big-box-store shovels I wasted money on before learning better.
The difference between disposable tools and lifetime tools often comes down to materials. Forged steel (stamped with "forged" or identifiable by visible forging marks) holds edges longer and resists bending better than stamped steel. Socket connections (where the handle fits into a metal sleeve on the tool head) prove more durable than tang connections (where a metal rod extends into the handle) for heavy-duty work.
But even the finest tool fails without basic care. My grandfather's fork survived because someone—first him, then my mother, now me—took ten minutes after each use to clean and store it properly. The maintenance ritual becomes part of the gardening rhythm itself. You come inside with soil under your nails, wipe down your tools with the same attention you give your hands, and hang them where they wait patiently for next time.
The best part? Well-maintained tools make gardening more enjoyable. Sharp blades cut cleaner, causing less plant damage. Balanced, solid handles reduce fatigue. Tools that function properly let you focus on the plants—the compost, the seedlings, the harvest—instead of fighting your equipment. That's the difference between garden maintenance feeling like a chore versus a pleasure.